C# WPF Vector Graphics Tutorial
The other day I’ve been struggling with including vector graphics in a WPF application I was working on. Once you get a hang of it the process is quite simple, here is how I solved it by using vector graphics saved in .svg format and SvgToXaml converter.
1. Svg To Xaml
In your git client navigate to the directory where you want to put the solution and clone it:
git clone https://github.com/BerndK/SvgToXaml.gitAlternatively you can go to github and download the repository as a .zip file.
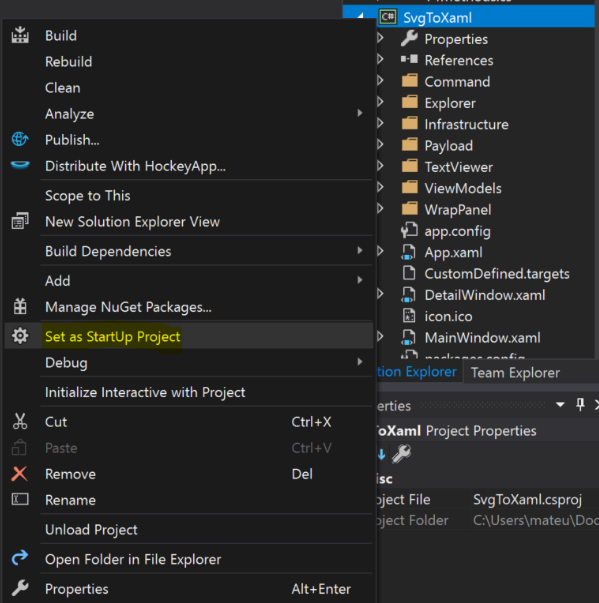
Once you have a project on your disk open the SvgToXaml.sln. In the Solution Explorer find SvgToXaml project, right click on it and select Set as StartUp Project:
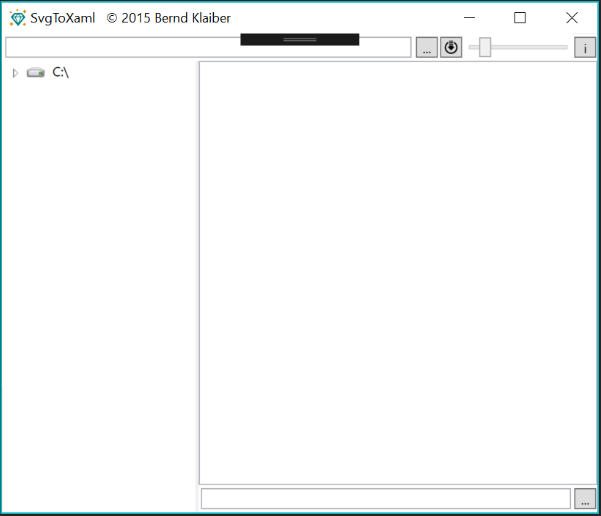
Now, when you start the project the program should launch:
2. Creating a test solution
Let’s start by creating new project in Visual Studio (WPF App) and let’s name it SvgTest. Once created, in the solution explorer right click on the SvgTest project -> Add -> New Folder. Name it Assets.
3. Converting SVG to Xaml
Let’s get geeky and download a NASA .svg logo:

In SvgToXaml navigate to where you downloaded the logo and press the button to export all svgs to .xaml:

Export the generated .xaml file to Assets folder in the SvgTest project with the name NASA.xaml. So far I was leaving the NameSpace and Name Prefix empty when prompted but you might want to experiment with those settings.
Congrats! You have now exported your first .svg to xaml!
4. Importing the .xaml file to the project
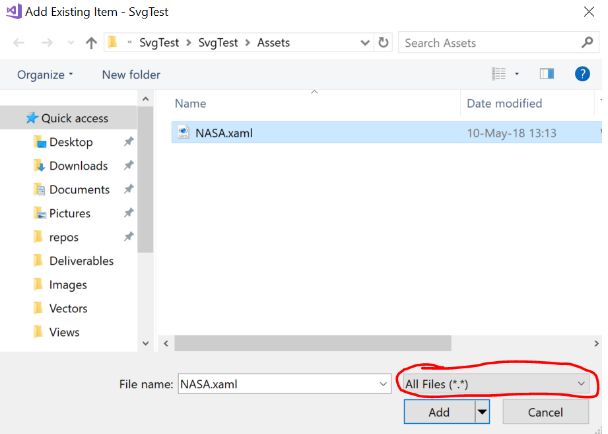
Open up your SvgTest project in Visual Studio and in the Solution Explorer right click on Assets folder -> Add -> Existing Item. Navigate to Assets Directory and select the file visibility to All Files. You should be able to see the NASA.xaml file in the directory
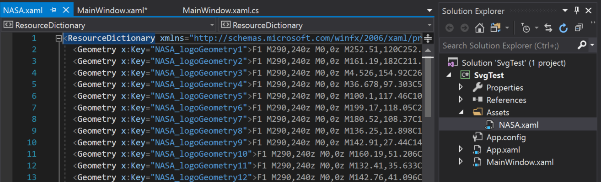
Now you should see NASA.xaml in your Solution Explorer and you should be able to display the paths of the .xaml file:
5. Using generated .xaml in WPF application
Let’s now use our vector image in the WPF application. First thing we need to do is to add the .xaml file with our image to Application Resources. Double click App.xaml and add a Resource Dictionary to Application.Resources:
<Application.Resources>
  <ResourceDictionary>
    <ResourceDictionary.MergedDictionaries>
      <ResourceDictionary x:Name="NasaLogo" Source="Assets/NASA.xaml"/>
    </ResourceDictionary.MergedDictionaries>
  </ResourceDictionary>
</Application.Resources>
Let’s display our vector image in the WPF application!
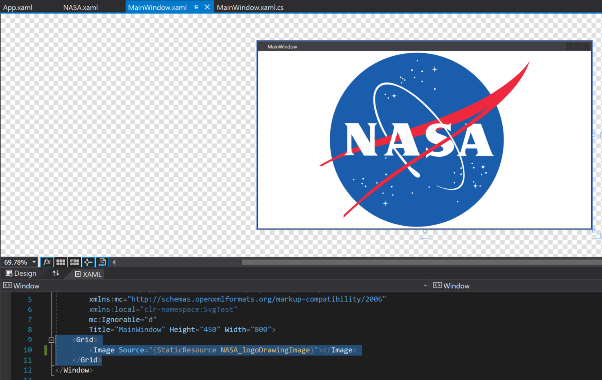
Double click on MainWindowApp.xaml and in the Grid insert an Image with a source set to our StaticResource. Intelisense is your friend and it should suggest the StaticResource Name:
<Grid>
    <Image Source="{StaticResource NASA_logoDrawingImage}"></Image>
</Grid>
Aaaand takeoff! Our image should be displayed in our main form:
Once we compile and run the program you should be able to resize the main window without losing quality. How awesome is that?!
6. Homework
In a default view, when debugging, Visual Studio shows the graph with Process Memory. What happens with the logo when we resize the application? Why does it happen?