ROS web tutorial part 1 - rosbridge server and roslibjs
In this beginners tutorial I’ll give you a step by step introduction how to use rosbridge server and roslibjs to communicate with ROS using your web browser. By the end of this tutorial we will have a working prototype of a simple website allowing you to control a robot using a virtual joystick.
Requirements
The tutorial below assumes the following tools:
- ROS Melodic running on Ubuntu 18.04
- Catkin tools
rosbridge_suite
Rosbridge suite is a set of packages that allows to exchange information between ROS and any other application capable of parsing JSON.
To get a full overview of rosbridge v2.0 protocol I recommend reading this GitHub page. In this tutorial we will use rosbridge on the ‘robot side’ of our robot software stack. This will allow us to exchange any information between ROS nodes and other applications (in our case an application running in the browser).
Setting up
Let’s start by creating a workspace for our project.
mkdir -p ~/catkin_ws/src
cd ~/catkin_ws/src
catkin create pkg robot_gui_bridge --catkin-deps rosbridge_server
cd ~/catkin_ws
rosdep install --from-paths src --ignore-src -r -y
In the first two lines of this shell snippet we create a directory structure for our ROS workspace. Then we create a package called robot_gui_bridge that depends on rosbridge_server (if you are not using catkin tools you can use the command catkin_create_pkg robot_gui_bridge rosbridge_server).
In the last line of the snippet we use rosdep to install all the required dependencies. Alternatively you could install the package manually using a command apt-get install ros-melodic-rosbridge-server but I find using rosdep to be a better practice, especially when you collaborate with others.
Adding a launch file and testing
Let’s add a simple launch file to our package:
mkdir ~/catkin_ws/src/robot_gui_bridge/launch
touch ~/catkin_ws/src/robot_gui_bridge/launch/websocket.launch
The contents of this file will be very simple:
<launch>
  <include file="$(find rosbridge_server)/launch/rosbridge_websocket.launch"/>
</launch>
Finally let’s test it:
cd ~/catkin_ws/
catkin build # or catkin_make
source devel/setup.bash
roslaunch robot_gui_bridge websocket.launch
If everything went well the rosbridge_websocket node should start and we should see a confirmation about it running in the terminal:
[INFO] [1561100304.196110]: Rosbridge WebSocket server started on port 9090roslibjs
Hello World
Let’s add a simple webpage to our project and let’s make it talk to ROS.
We will start by creating a file ~/catkin_ws/src/robot_gui_bridge/gui/gui.html with the following contents:
<!DOCTYPE html>
<html>
<head>
<meta charset="utf-8" />
<script type="text/javascript" src="http://static.robotwebtools.org/roslibjs/current/roslib.min.js"></script>
<script type="text/javascript" type="text/javascript">
var ros = new ROSLIB.Ros({
url : 'ws://localhost:9090'
});
ros.on('connection', function() {
document.getElementById("status").innerHTML = "Connected";
});
ros.on('error', function(error) {
document.getElementById("status").innerHTML = "Error";
});
ros.on('close', function() {
document.getElementById("status").innerHTML = "Closed";
});
</script>
</head>
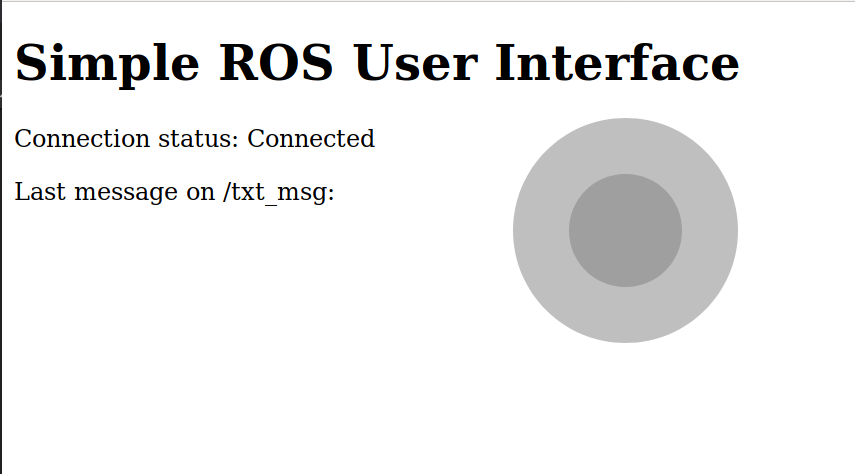
<body>
<h1>Simple ROS User Interface</h1>
<p>Connection status: <span id="status"></span></p>
<p>Last /txt_msg received: <span id="msg"></span></p>
</body>
</html>We start the script by importing minified version of roslib from Robot Web Tools CDN.
  var ros = new ROSLIB.Ros({
    url : 'ws://localhost:9090'
  });
Here we will create a Ros object that we will use to communicate with other nodes later on. We are currently running the UI and the rosbridge on the same machine, hence we are listening on localhost and the default roslib websocket port 9090. For more information about the Ros object see the documentation.
  ros.on('connection', function() {
    document.getElementById("status").innerHTML = "Connected";
  });
The above snippet creates listener for Ros event (in this case the connection event). When the event is raised we find an html element with “status” id (in this case a span element that we defined in the body) and we change it’s inner html to the message we want to display.
Listening to a topic
As a next step let’s subscribe to a topic that will accept a String message and show it in the browser window. We will place the code in our website script and the code will look as follows:
  var txt_listener = new ROSLIB.Topic({
    ros : ros,
    name : '/txt_msg',
    messageType : 'std_msgs/String'
  });

  txt_listener.subscribe(function(m) {
    document.getElementById("msg").innerHTML = m.data;
  });
This code declares a txt_listener object that will listen to messages on /txt_msg topic and that will accept messages of type String. Then we create an event listener that will call an anonymous function that changes inner html of our “msg” span element to the data field of the message.
To test this code follow these steps:
- Launch our websocket launch file:
roslaunch robot_gui_bridge websocket.launch - Open the website that we created in the browser of your choice
- You should now see the text “Connected” in our connection status
- In terminal publish to /txt_msg topic:
rostopic pub /txt_msg std_msgs/String "data: 'Test message'" -1 - The message should appear in the span field that we created for this purpose
Warning: pay attention to the messages when you launch the websocket.launch. If after opening the website file you get an error failing WebSocket opening handshake ('WebSocket connection denied: origin 'null' not allowed') then scroll down to the bottom of the page where I offer a simple workaround to this issue.
Publishing on a topic
Before we implement a virtual joystick let’s create a function that we will use to publish a robot velocity:
  cmd_vel_listener = new ROSLIB.Topic({
    ros : ros,
    name : "/cmd_vel",
    messageType : 'geometry_msgs/Twist'
  });

  move = function (linear, angular) {
    var twist = new ROSLIB.Message({
      linear: {
        x: linear,
        y: 0,
        z: 0
      },
      angular: {
        x: 0,
        y: 0,
        z: angular
      }
    });
    cmd_vel_listener.publish(twist);
  }
Similarly to when we declared our String listener we start by creating a Topic object called cmd_vel_listener and that will be publishing Twist messages on /cmd_vel topic. Afterwards we create a function called move that takes two arguments: a linear and angular speed (by ROS convention in m/s) and publishes it through our cmd_vel_listener object.
To test what we have so far you can modify the txt_listener event handler to publish a fixed velocity whenever it receives data:
  txt_listener.subscribe(function(m) {
    document.getElementById("msg").innerHTML = m.data;
    move(1, 0);
  });
To test it simply run rostopic echo /cmd_vel in the terminal and then send some messages to /txt_msg topic.
Virtual joystick
Hello nipple.js
For the virtual joystick we will be using a nipple.js library. To get the minimum viable code for implementing it we will need to:
- Import nipple.js library:
<script type="text/javascript" src="https://cdnjs.cloudflare.com/ajax/libs/nipplejs/0.7.3/nipplejs.js"></script>In this tutorial I chose to use the library from the cloudflare CDN for simplicity. In a proper implementation you will probably want to serve the nipple.js yourself.
- Add a
<div>element that will hold our virtual joystick (place it in the body of the webpage):
<div id="zone_joystick" style="position: relative;"></div>- Instantiate the joystick and handle start of movement, the movement itself and end of movement events (this code will live in our main script):
    createJoystick = function () {
      var options = {
        zone: document.getElementById('zone_joystick'),
        threshold: 0.1,
        position: { left: 50 + '%' },
        mode: 'static',
        size: 150,
        color: '#000000',
      };
      manager = nipplejs.create(options);

      linear_speed = 0;
      angular_speed = 0;

      self.manager.on('start', function (event, nipple) {
        console.log("Movement start");
      });

      self.manager.on('move', function (event, nipple) {
        console.log("Moving");
      });

      self.manager.on('end', function () {
        console.log("Movement end");
      });
    }
    window.onload = function () {
      createJoystick();
    }
In the above snippet we declare a createJoystick function that will be called when the browser window is loaded (this ensures that the zone_joystick element will be available when we create a joystick instance). In createJoystick we declare some of the many options for the joystick, create event handlers for the (start, move, end) events and declare some placeholder variables for linear and angular speed commands.
Executing the code we’ve created so far we should see the following result in our browser inspector:

At this stage we are ready to start working on making our joystick move the robot!
Handling the start event
Our movement function will look as follows:
manager.on('start', function (event, nipple) {
  timer = setInterval(function () {
    move(linear_speed, angular_speed);
  }, 25);
});
All this code does is spawn a timer that will call the move function with the linear_speed and angular_speed variables at a rate of 25 Hz. If we didn’t create the timer once we had moved the joystick and kept it still the move(…) wouldn’t be called and depending on your robot implementation this should cause a velocity command timeout. If you don’t have velocity timeout implemented on your platform then please rethink your system architecture!
Handling the end event
On movement end event we will clear the timer to stop publishing desired velocity at 25Hz and we will send out a single (0,0) velocity command to stop the robot:
manager.on('end', function () {
  if (timer) {
    clearInterval(timer);
  }
  self.move(0, 0);
});
Handling joystick movement event
The data we are interested in coming out of nipple.js is in the format (distance, angle). In the move event handler we will convert the distance and the angle to linear velocity (movement forward) and angular velocity (rotation around the z axis of the robot frame):
manager.on('move', function (event, nipple) {
  max_linear = 5.0; // m/s
  max_angular = 2.0; // rad/s
  max_distance = 75.0; // pixels;
  linear_speed = Math.sin(nipple.angle.radian) * max_linear * nipple.distance/max_distance;
  angular_speed = -Math.cos(nipple.angle.radian) * max_angular * nipple.distance/max_distance;
});
We declared max_linear and max_angular variables so that we can easily define maximum linear and angular velocities of the robot and also the maximum distance that is reported by the library. Having all those variables we can convert the joystick movement from polar coordinates to desired linear and angular velocity.
Putting it all together
Here you can find a gist with the full source code that we created in this tutorial.
To test it out you can:
- Launch the launch file that we created:
roslaunch robot_gui_bridge websocket.launch - Look at the data either through
rostopic echo /cmd_vel
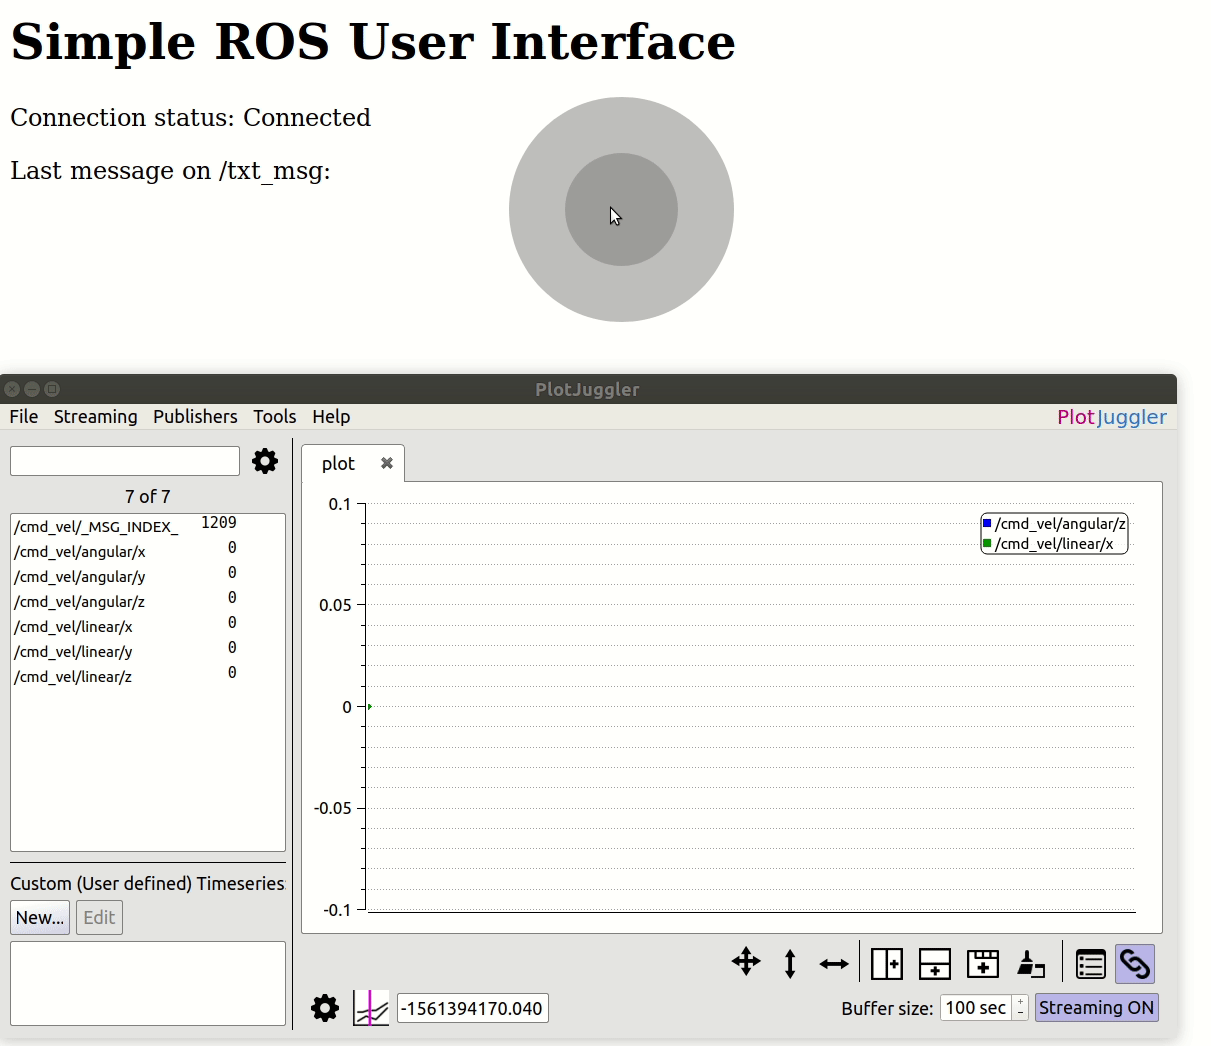
Alternatively you can use PlotJuggler to plot the data as you move the joystick:
The next steps
There is a lot to do if you would like to improve our solution! Here is some homework for the adventurous:
- Style the webpage using CSS
- Show the connection status as a colorful label with text
- Test drive GUI with turtlesim
- Launch some robot in Gazebo and drive it around using the GUI
If you found this tutorial useful feel free to let me know in the comments! There are two more tutorials coming: in the second part of this tutorial we will look into camera libraries in ROS and in the third tutorial we will look exclusively into ros web video server.
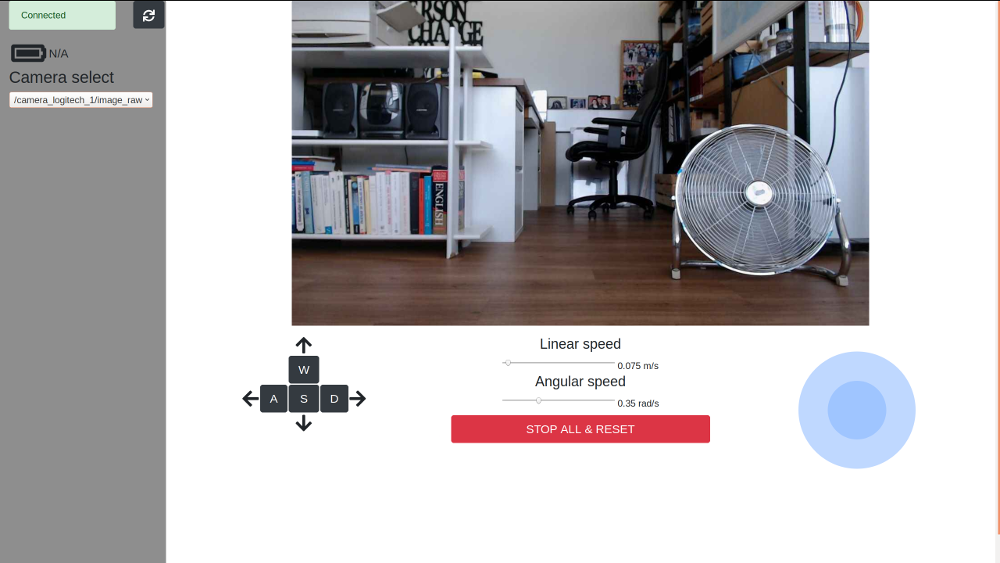
With some more effort you could turn it into something resembling the Robosynthesis User Interface.
Update: solving failing WebSocket opening handshake error
It seems that rosbridge right now throws an error:
failing WebSocket opening handshake ('WebSocket connection denied: origin 'null' not allowed')
when you try to run your website directly from your disk (GitHub issue). To get rid of this error we can start a simple http server (you probably shouldn’t run it in a production environment though).
Let’s navigate to the directory with the .html file in the terminal. As soon as you are in the correct directory we can start a Python http server using this command: python -m SimpleHTTPServer. Afterwards you should be able to go to http://localhost:8000/ and you should see a directory listing containing your single gui.html file. Click on it and it should open your website wihtout Rosbridge complaining about origin ‘null’ not being allowed.