Enabling PPS on Jetson Nano
I believe that in everyone’s life there comes a time where they need to do what they’ve always feared: they need to compile a Unix Kernel. This post is a step by step guide how I enabled the PPS support on Jetson Nano.
Background
For one of the projects I’m working on we wanted to have as precise timing information as it gets on a Linux board. In this particular project I opted on using gpsd together with PPS for driving the clock of Jetson Nano. During the research I’ve found a couple of dead ends and therefore I decided that I’d describe the process that I’ve followed in case anyone finds it helpful.
I’ve used the following process on my Jetson Nano Developer edition B01 with Jetpack 4.3 and a kernel version 32.3.1.
Useful links
Here are the links that I’ve found most helpful while researching the steps to enable PPS on Jetson Nano:
- Jetson Kernel Customization - should contain the most up to date process
- Ridgerun wiki - this guide might be slightly outdated but it helped me fill in the gaps
- PPS on Jetson Nano - a topic from Nvidia Developer Forum
- Enabling PPS on Jetson Nano with Jetpack 4.3 - a topic I started on Nvidia Developer Forum asking for support in enabling the PPS support
Tools setup
The paths I’ll be showing here are in the format they appear on my machine (Ubuntu 18.04), where my home directory is /home/mat. If you are following this tutorial make sure that you change the paths to match your setup.
- Install the toolchain following these instructions
- Download and install the SDK manager (I’ve used the version 1.0.1.5538 in this tutorial) After it’s downloaded, launch it and set up the development environment. In my case it looked like this:
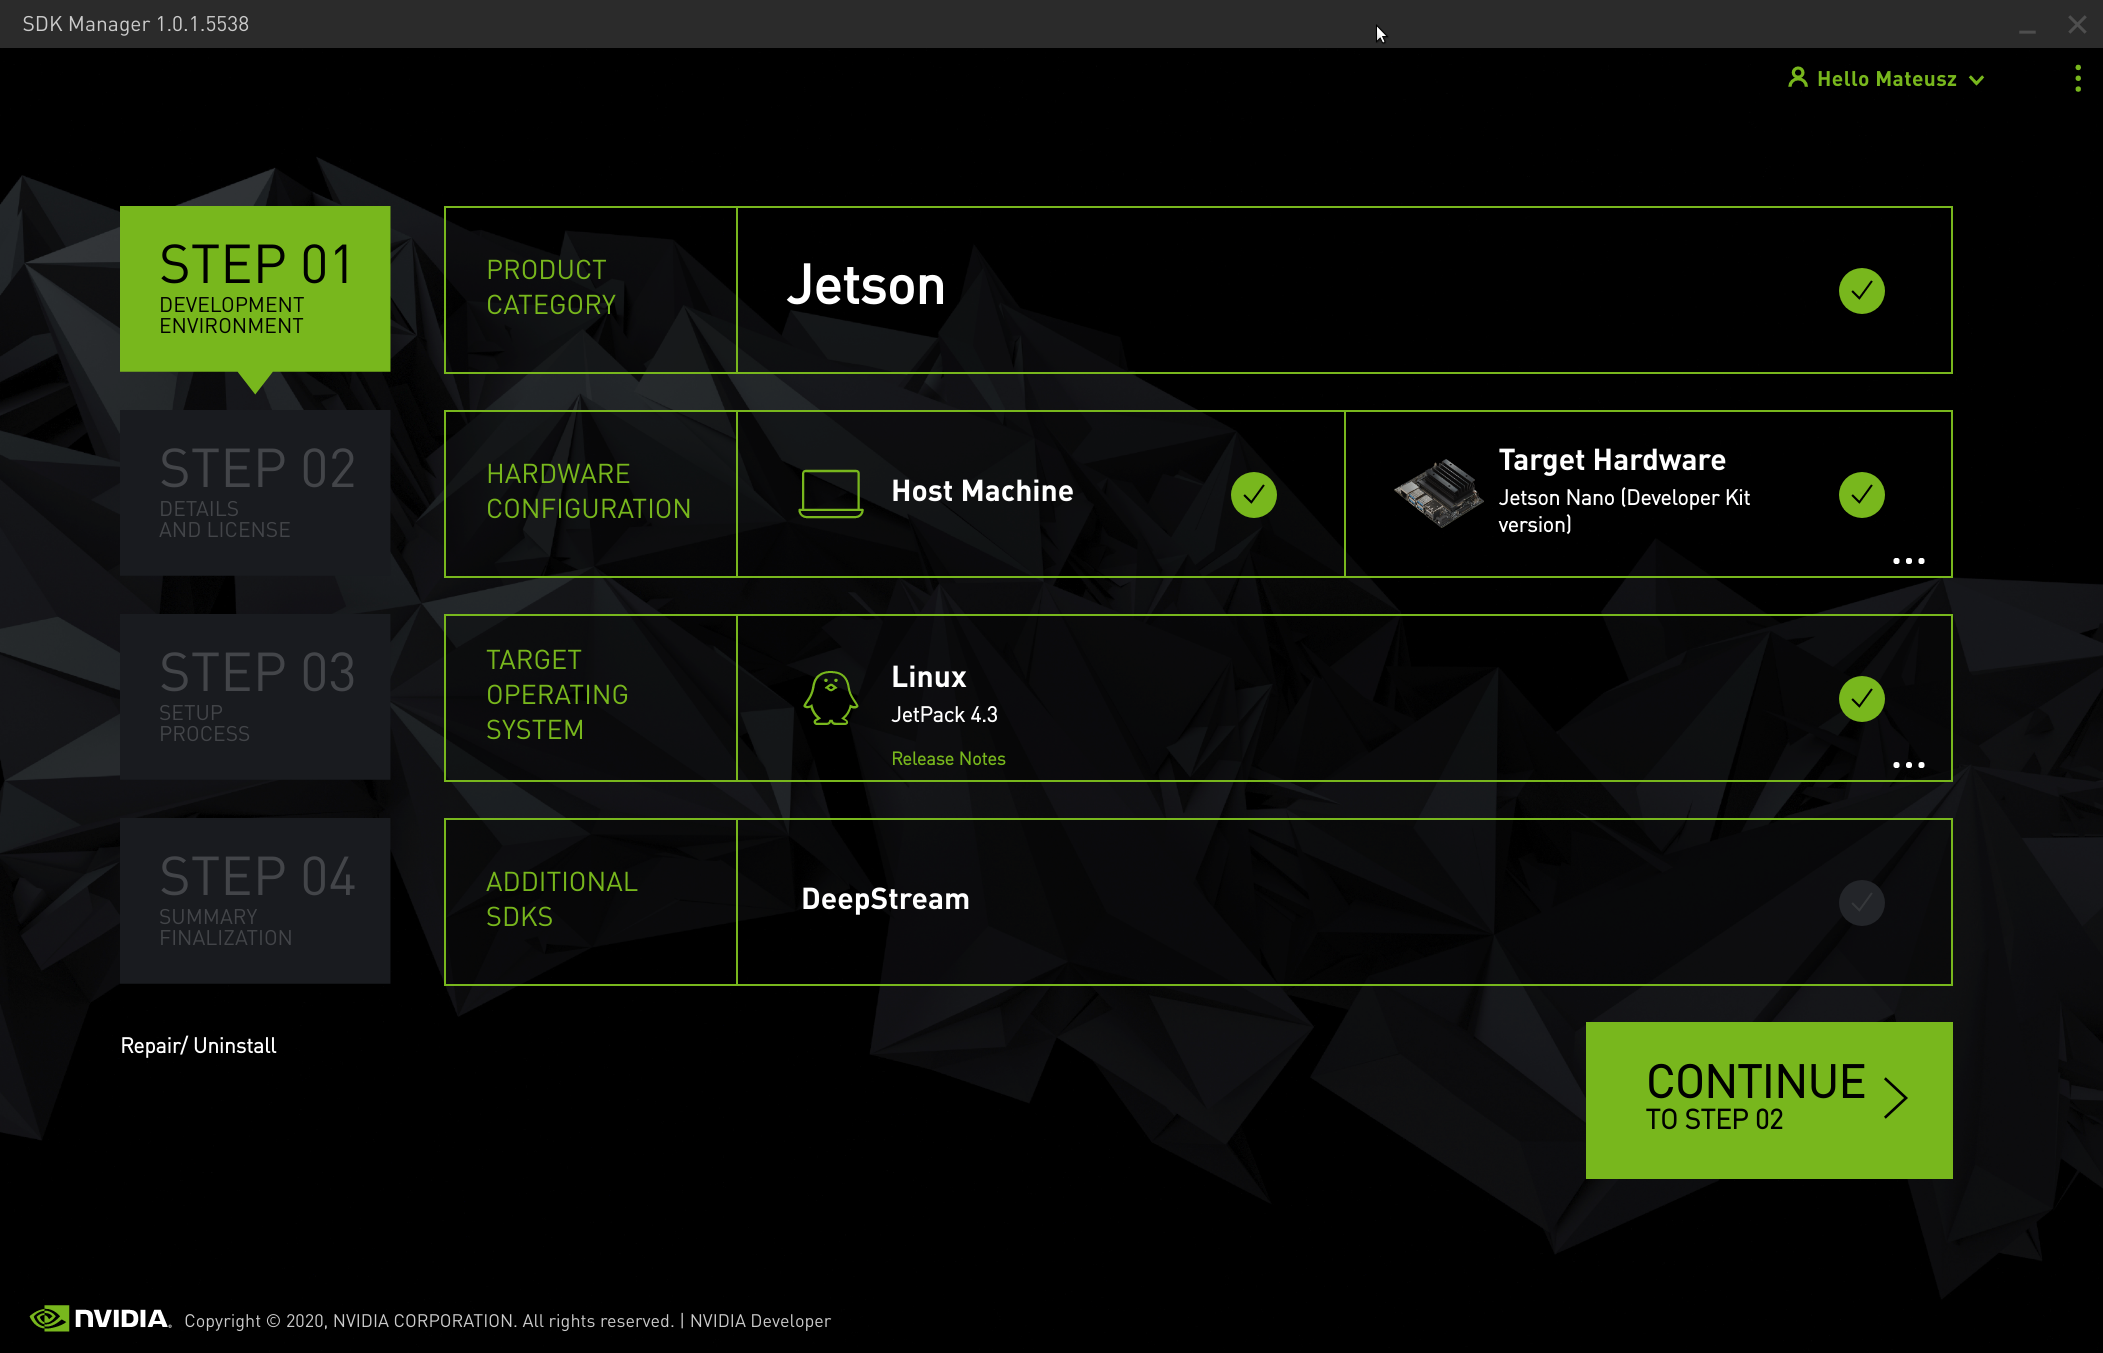
Make sure that you select the Target Hardware to match your board. In my case it is Jetson Nano (Developer Kit version) (P3448)
- In STEP 02 of the SDK I used the default settings and set the Target HW image folder as
/home/mat/nvidia/nvidia_sdk. Then I pressed continue to download all the packages.
Configuring the kernel
These steps that I’ve performed should match the instructions you will find in the Jetson Kernel Customization page I posted before but I’d advise you to cross check.
- Navigate to folder and create output kernel directory:
cd ~
cd nvidia
mkdir kernel_compiled
- Export variables:
export CROSS_COMPILE=$HOME/l4t-gcc/gcc-linaro-7.3.1-2018.05-x86_64_aarch64-linux-gnu/bin/aarch64-linux-gnu-
export TEGRA_KERNEL_OUT=/home/mat/nvidia/kernel_compiled
export LOCALVERSION=-tegra
- Sync the kernel repository by running
source_sync.shin/nvidia/nvidia_sdk/JetPack_4.3_Linux_P3448/Linux_for_Tegra. I synced to the tagtegra-l4t-r32.3.1 - Build the kernel source configuration:
cd ~/nvidia/nvidia_sdk/JetPack_4.3_Linux_P3448/Linux_for_Tegra/sources/kernel/kernel-4.9
mkdir -p $TEGRA_KERNEL_OUT
make ARCH=arm64 O=$TEGRA_KERNEL_OUT tegra_defconfig
- Add PPS client support. In your editor of choice open the file .config in $cd $TEGRA_KERNEL_OUT directory (
cd $TEGRA_KERNEL_OUT) and make sure the PPS is enabled as follows:
#
# PPS support
#
CONFIG_PPS=y
# CONFIG_PPS_DEBUG is not set

#
# PPS clients support
#
CONFIG_PPS_CLIENT_KTIMER=y
CONFIG_PPS_CLIENT_LDISC=y
CONFIG_PPS_CLIENT_GPIO=y
- Add PPS gpio support. In ~/nvidia/nvidia_sdk/JetPack_4.3_Linux_P3448/Linux_for_Tegra/sources/hardware/nvidia/soc/t210/kernel-dts/tegra210-soc edit
tegra210-soc-base.dtsiand add the following lines:
pps {
    gpios = <&gpio TEGRA_GPIO(B, 7) 0>;

    compatible = "pps-gpio";
    status = "okay";
};
Building and flashing the kernel
- Build the kernel:
cd ~/nvidia/nvidia_sdk/JetPack_4.3_Linux_P3448/Linux_for_Tegra/sources/kernel/kernel-4.9
make ARCH=arm64 O=$TEGRA_KERNEL_OUT -j8
-
Prepare the board for flashing. In case of board B01: make sure the board is powered off, short pins SYS_RST and GND to enter recovery mode, power up the board from the power supply and connect the board to the USB port of your machine
-
Flash kernel
cd ~/nvidia/nvidia_sdk/JetPack_4.3_Linux_P3448/Linux_for_Tegra/kernel
cp $TEGRA_KERNEL_OUT/arch/arm64/boot/Image Image
cd dtb
cp -a /$TEGRA_KERNEL_OUT/arch/arm64/boot/dts/. .
cd ~/nvidia/nvidia_sdk/JetPack_4.3_Linux_P3448/Linux_for_Tegra
sudo ./flash.sh jetson-nano-qspi-sd mmcblk0p1
- After the previous step you should see the board flashing. After the flashing is done you will be able to set up the system using a computer screen, keyboard etc.
Testing pps
- Make sure
ls /dev/pps*returns/dev/pps0and/dev/pps1 - Install pps-tools
sudo apt-get install pps-tools - Run pps test on /dev/pps0:
sudo ppstest /dev/pps0You should see the output like this, with no PPS device connected:
trying PPS source "/dev/pps0"
found PPS source "/dev/pps0"
ok, found 1 source(s), now start fetching data...
source 0 - assert 1588064315.861849703, sequence: 4355 - clear  0.000000000, sequence: 0
source 0 - assert 1588064316.885912540, sequence: 4356 - clear  0.000000000, sequence: 0
source 0 - assert 1588064317.909913941, sequence: 4357 - clear  0.000000000, sequence: 0
source 0 - assert 1588064318.933846094, sequence: 4358 - clear  0.000000000, sequence: 0
source 0 - assert 1588064319.957913486, sequence: 4359 - clear  0.000000000, sequence: 0
...
- Now, to test the /dev/pps1 device you will need to connect your PPS source to pin 18 of the 40-pin header of the Jetson Nano (probably connecting ground pins between the PPS source and the Jetson won’t hurt either). By running a ppstest again on /dev/pps1 you should see a similar output as we had with /dev/pps0
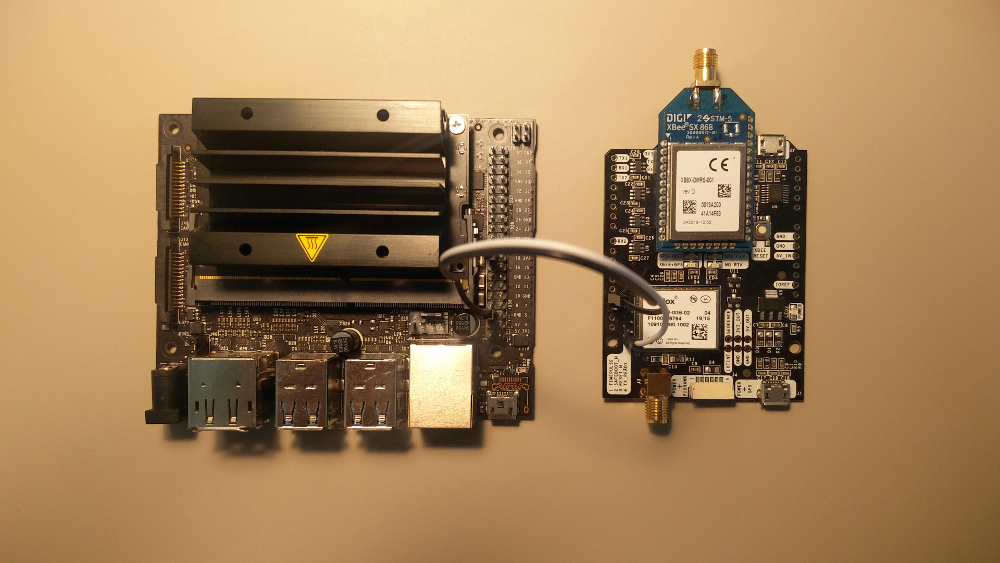
That should be it! The setup you can see in the above picture worked well for the PPS input after connecting the antennas and powering everything up. Now, with some NMEA sentences being sent from the simpleRTK2B to the Jetson and some gpsd and chrony configurations I should be able to drive the clock of the Jetson.
Hope these steps will save you a bit of time looking for the PPS solution, especially if like me it was the first time you were building a Kernel.