ROS web tutorial part 2 - working with cameras
In this intermediate tutorial we will look into using libuvc_camera package with a simple USB camera. In the process we will learn something about udev rules and nodelets.
Requirements
The tutorial below assumes the following tools:
- ROS Melodic running on Ubuntu 18.04
- Catkin tools
- In this tutorial we will not be using a web browser (sorry!)
- A UVC enabled camera (a standard webcam should do)
Knowledge requirements:
- Completion of ROS beginner and intermediate tutorials from ROS wiki
UVC
UVC (USB Video Class) is a class of USB devices that support streaming of videos. If you would like to know more about UVC then Microsoft created a nice description of UVC driver. If you would like to dig even more into the topic then you can read the USB Video Class document set from USB.org.
Setting up the camera in Ubuntu
Udev rules
First thing we want to do when adding a camera to the system is to add the udev rules for it. Udev is a device manager for Linux kernel. For more information on Udev you can look into the following sources: 1 2.
Before plugging in the camera to the USB let’s check the output of:
ls /dev/video*
Since my laptop has 2 built-in cameras I can see two video devices that are ready for access. Plugging in my USB camera and repeating the ls command the output looks like this:

Knowing our camera device node path (/dev/video2) we will now check the USB attributes of the camera using the command:
udevadm info --name=/dev/video2 --attribute-walkThe output of this command looks as follows on my machine (output trimmed for brevity):
looking at device '/devices/pci0000:00/0000:00:14.0/usb1/1-1/1-1:1.0/video4linux/video2':
    KERNEL=="video2"
    SUBSYSTEM=="video4linux"
    DRIVER==""
    ATTR{dev_debug}=="0"
    ATTR{index}=="0"
    ATTR{name}=="HD USB Camera: HD USB Camera"

  looking at parent device '/devices/pci0000:00/0000:00:14.0/usb1/1-1/1-1:1.0':
    KERNELS=="1-1:1.0"
    SUBSYSTEMS=="usb"
    DRIVERS=="uvcvideo"
    ATTRS{authorized}=="1"
    ATTRS{bAlternateSetting}==" 0"
    ATTRS{bInterfaceClass}=="0e"
    ATTRS{bInterfaceNumber}=="00"
    ATTRS{bInterfaceProtocol}=="00"
    ATTRS{bInterfaceSubClass}=="01"
    ATTRS{bNumEndpoints}=="01"
    ATTRS{iad_bFirstInterface}=="00"
    ATTRS{iad_bFunctionClass}=="0e"
    ATTRS{iad_bFunctionProtocol}=="00"
    ATTRS{iad_bFunctionSubClass}=="03"
    ATTRS{iad_bInterfaceCount}=="02"
    ATTRS{interface}=="HD USB Camera"
    ATTRS{supports_autosuspend}=="1"

  looking at parent device '/devices/pci0000:00/0000:00:14.0/usb1/1-1':
    KERNELS=="1-1"
    SUBSYSTEMS=="usb"
    DRIVERS=="usb"
    ATTRS{authorized}=="1"
    ATTRS{avoid_reset_quirk}=="0"
    ATTRS{bConfigurationValue}=="1"
    ATTRS{bDeviceClass}=="ef"
    ATTRS{bDeviceProtocol}=="01"
    ATTRS{bDeviceSubClass}=="02"
    ATTRS{bMaxPacketSize0}=="64"
    ATTRS{bMaxPower}=="500mA"
    ATTRS{bNumConfigurations}=="1"
    ATTRS{bNumInterfaces}==" 2"
    ATTRS{bcdDevice}=="2702"
    ATTRS{bmAttributes}=="80"
    ATTRS{busnum}=="1"
    ATTRS{configuration}==""
    ATTRS{devnum}=="7"
    ATTRS{devpath}=="1"
    ATTRS{idProduct}=="9320"
    ATTRS{idVendor}=="05a3"
    ATTRS{ltm_capable}=="no"
    ATTRS{manufacturer}=="HD USB Camera"
    ATTRS{maxchild}=="0"
    ATTRS{product}=="HD USB Camera"
    ATTRS{quirks}=="0x0"
    ATTRS{removable}=="removable"
    ATTRS{serial}=="HD USB Camera"
    ATTRS{speed}=="480"
    ATTRS{urbnum}=="63"
    ATTRS{version}==" 2.00"
    ...
From this snippet we are mostly interested in the section that begins with looking at parent device ‘/devices/pci0000:00/0000:00:14.0/usb1/1-1’: as those are our camera parameters. From all those parameters at this stage we will be interested in the below ones (please note that those will almost certainly differ on your camera!):
ATTRS{idProduct}=="9320"
ATTRS{idVendor}=="05a3"
Knowing this information we can add a Udev rule for our camera by creating a file /etc/udev/rules.d/99-uvc.rules (note that creating and editing this file will most likely require root permissions) with the following contents:
SUBSYSTEMS=="usb", ENV{DEVTYPE}=="usb_device", ATTRS{idVendor}=="05a3", ATTRS{idProduct}=="9320", MODE="0666"Afterwards let’s reload the Udev rules:
sudo udevadm control --reload-rulesand to be sure disconnect your camera and connect it back in. If you used the correct idVendor and idProduct attributes in your Udev rules you shouldn’t have issues in the next part of the tutorial!
Camera parameters
To learn more about our camera we will execute the following command in a terminal:
v4l2-ctl --list-formats-ext -d /dev/video2Here is the truncated output of this command on my machine:
ioctl: VIDIOC_ENUM_FMT
        Index       : 0
        Type        : Video Capture
        Pixel Format: 'MJPG' (compressed)
        Name        : Motion-JPEG
                Size: Discrete 1920x1080
                        Interval: Discrete 0.033s (30.000 fps)
                        Interval: Discrete 0.040s (25.000 fps)
                        Interval: Discrete 0.067s (15.000 fps)
                Size: Discrete 1280x720
                        Interval: Discrete 0.033s (30.000 fps)
                        Interval: Discrete 0.040s (25.000 fps)
                        Interval: Discrete 0.067s (15.000 fps)
                Size: Discrete 800x600
                        Interval: Discrete 0.033s (30.000 fps)
                        Interval: Discrete 0.040s (25.000 fps)
                        Interval: Discrete 0.067s (15.000 fps)
...
From this output we learn the supported pixel format (MJPG), the supported resolutions and the image rate. Those values will be crucial later on when we set up a libuvc_camera launch file.
Nodelets
Before we jump into integrating our camera with ROS let’s talk nodelets! Here is an excerpt about nodelets from the ROS wiki:
Nodelets are designed to provide a way to run multiple algorithms on a single machine, in a single process, without incurring copy costs when passing messages intraprocess. roscpp has optimizations to do zero copy pointer passing between publish and subscribe calls within the same node. To do this nodelets allow dynamic loading of classes into the same node, however they provide simple separate namespaces such that the nodelet acts like a separate node, despite being in the same process. This has been extended further in that it is dynamically loadable at runtime using pluginlib.
Firstly why do we care? Imagine a situation in which we have a ROS node that performs object tracking on the provided image and another node that receives camera image stream and publishes it on a topic of object tracking node. What then happens is that our camera node create the message that will be serialized and then sent over TCP or UDP to be deserialized by the object tracking node. This serialization and deserialization is quite an overhead and nodelets allow you to overcome this by working in the same process.
Note that for nodelets to be useful the two nodelets need to run on the same machine!
For the further read you can check out this excellent post from Clearpath Robotics about nodelets.
In case of our tutorial we will not gain anything by running our camera processing as a nodelet but we know that you will want to expand the project later on hence we will prepare you for what lies ahead of you.
libuvc_camera
As I said before in this tutorial we will be using libuvc_camera package. You can install libuvc_camera using the following command: sudo apt-get install ros-melodic-libuvc-camera.
After that we are ready to create the ROS package we will hold our camera in. In your ROS workspace simply execute:
cd ~/ros_ws/src
catkin create pkg my_camera --catkin-deps libuvc_camera
mkdir ~/ros_ws/src/my_camera/launch
The minimal launch file for our nodelet will look as follows:
<launch>

  <node pkg="nodelet" type="nodelet" name="nodelet_manager" args="manager" output="screen"/>

  <node pkg="nodelet" type="nodelet" name="libuvc_camera" args="load libuvc_camera/driver /nodelet_manager" output="screen">
    <param name="frame_id" value="elp_camera" />
    <!-- Parameters used to find the camera -->
    <param name="vendor" value="0x05a3"/>
    <param name="product" value="0x9422"/>

    <!-- Image size and type -->
    <param name="width" value="1280"/>
    <param name="height" value="720"/>
    <param name="video_mode" value="mjpeg"/>
    <param name="frame_rate" value="15"/>

    <!-- <param name="camera_info_url" value="file://$(find my_camera)/config/elp.yaml"/> -->
  </node>


</launch>
In the line <node pkg="nodelet" type="nodelet" name="nodelet_manager" args="manager" output="screen"/> we create a nodelet_manager that needs to be referenced in all the nodelets that will be sharing information with one another.
<node pkg="nodelet" type="nodelet" name="libuvc_camera" ... creates an instance of a libuvc_camera/driver nodelet with nodelet manager set to “nodelet_manager”.
Parameter wise we set up the following ones:
- frame_id - the tf coordinate frame for our camera image feed
- vendor - the USB device vendor we obtained in Udev rules section of this blog post
- product - the USB device product we obtained in Udev rules section of this blog post
- width - the width of the image (needs to match the output we’ve seen in Camera parameters section)
- height - the height of the image (needs to match the output we’ve seen in Camera parameters section)
- video_mode - pixel format (needs to match the output we’ve seen in Camera parameters section)
- frame_rate - camera’s frame rate (needs to match the output we’ve seen in Camera parameters section)
- camera_info_url - I commented this one out but you could use it for camera calibration
This is only a fraction of the parameters supported by libuvc_camera. For a full list you can check the UVCCamera.cfg file.
Testing it out
We should now be ready to test our camera. Make sure that your workspace is built and sourced and start the launch file that we’ve created:
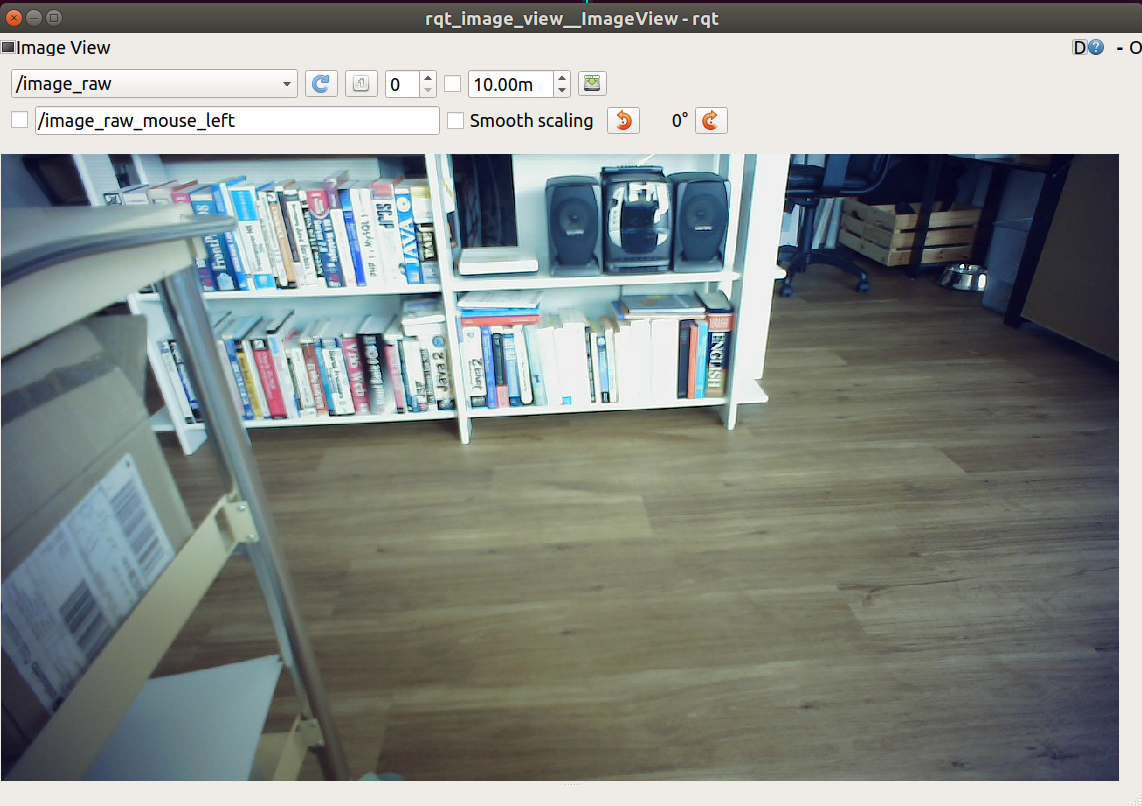
roslaunch my_camera elp.launchIn another terminal you can launch rqt_image_view to check the received image feed:
rosrun rqt_image_view rqt_image_viewIf everything went right you should be able to specify the topic to look at and view the feed

In the next post in this series we will look into ROS web video server!